
Open source, creator-centric, and build with NodeJS: the Ghost CMS is wonderful. Installing Ghost locally on Windows is a great way to give it a test drive to see if it is right for you. But it can be a bit tricky.
The thing about trying to install Ghost CMS on Windows is that there a few, let's say nuances. Ghost CMS is actually designed to be run on a specific Ubuntu Linux version. So you have to perform some extra steps to setup a Ghost blog on Windows. Fear not, it can and shall be done.
Quick overview to install Ghost CMS on Windows
(1) To actually install Ghost CMS on Windows, you will need to get the backend server setup. So you will have to install NodeJS server, if you don't already have it. Which most people on Windows don't already have a NodeJS server setup. Since most just using something like XAMPP for a localhost PHP/MySQL server.
(2) After NodeJS is installed, you can use the Node Package Manager (aka npm) to install Ghost blog on Windows. When installing Ghost locally, it will actually use a local SQLite database for you to perform your testing on. No need to worry about having a MySQL database installed and ready to use with Ghost CMS. How nice of them :)
(3) Once your localhost Ghost blog is installed, you can work your way through the very simple setup wizard to create your account and start getting to know Ghost CMS.
Let's get to it!
Install Node JS server on Windows
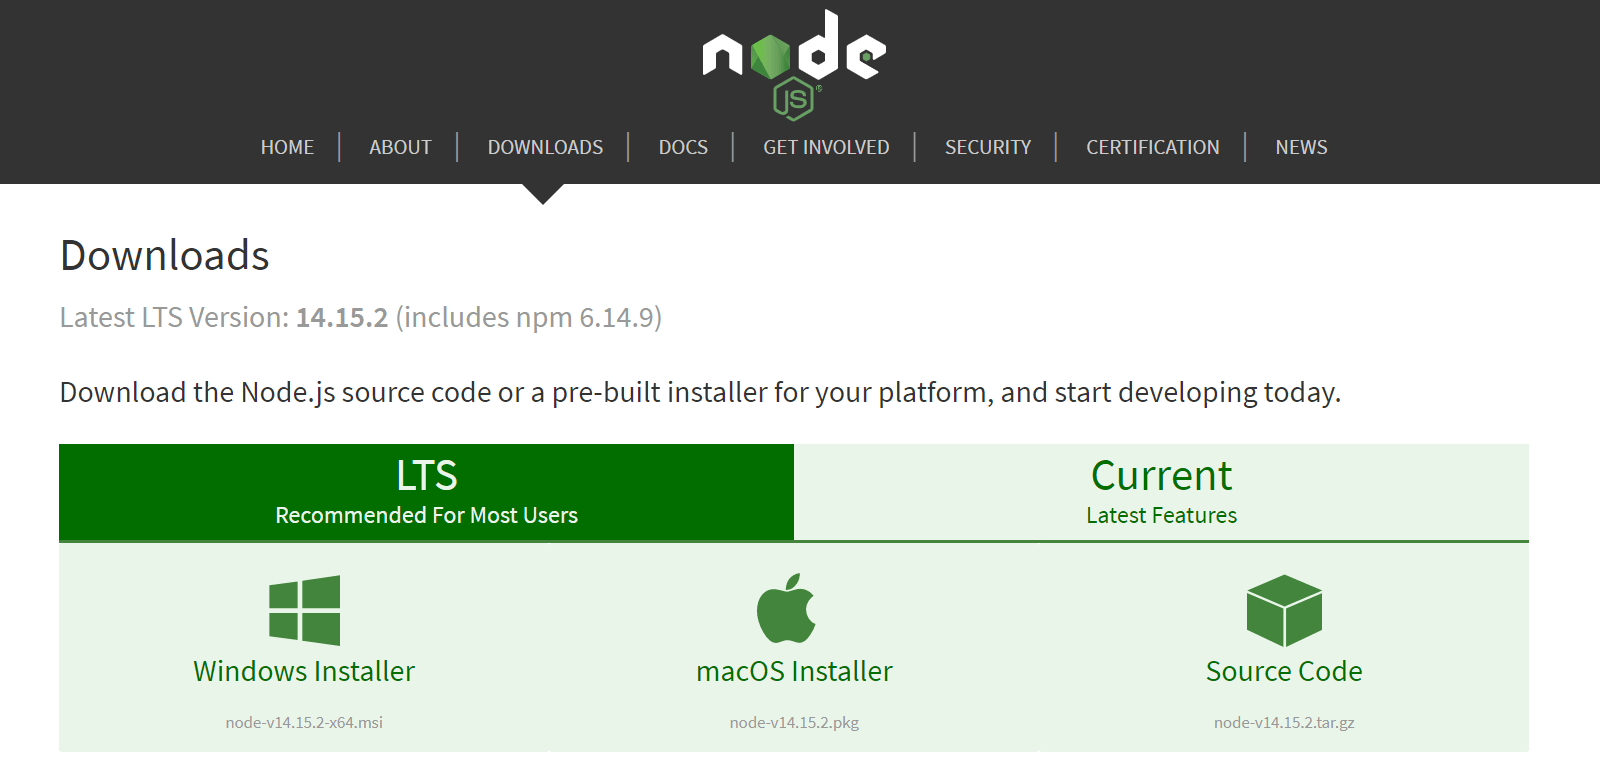
Download the NodeJS installer from NodeJS.org. You can run through the generic Windows installer pretty smoothly. I recommend leaving all the defaults set as to where NodeJS will install to and the packages it will install. This just makes things easier.
Note: If you are using Visual Studio Code, like most developers using Windows, then you should for sure install Chocolatey. It will also install the VS Code addons to enable better integration into VS Code for your Ghost CMS editing.
As you install Node JS on Windows, you will get a PowerShell prompt that will run through a portion of the installation. This PowerShell will install Python, Chocolatey, and Visual Studio Tools if you do not already have them installed. Do note, it can take a few minutes to install all of these things. Totally okay. I think my installation took about 5 minutes.
So go get a fresh cup of coffee ☕
You should restart your computer after installing NodeJS in order for all the new dependencies and software packages to work properly.
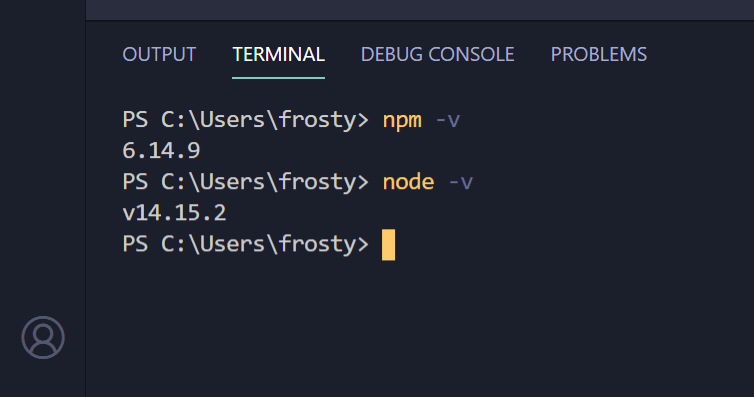
To verify Node is installed, run the node -v command and npm -v command in your windows terminal or PowerShell. (I prefer the terminal that is built into VS Code). The two commands should return the version number of your Node and node package manager (npm) version. If the return a number, then you are good to go. If not, then your installation was not successful and you might need to try again.
Install Ghost CMS on Windows
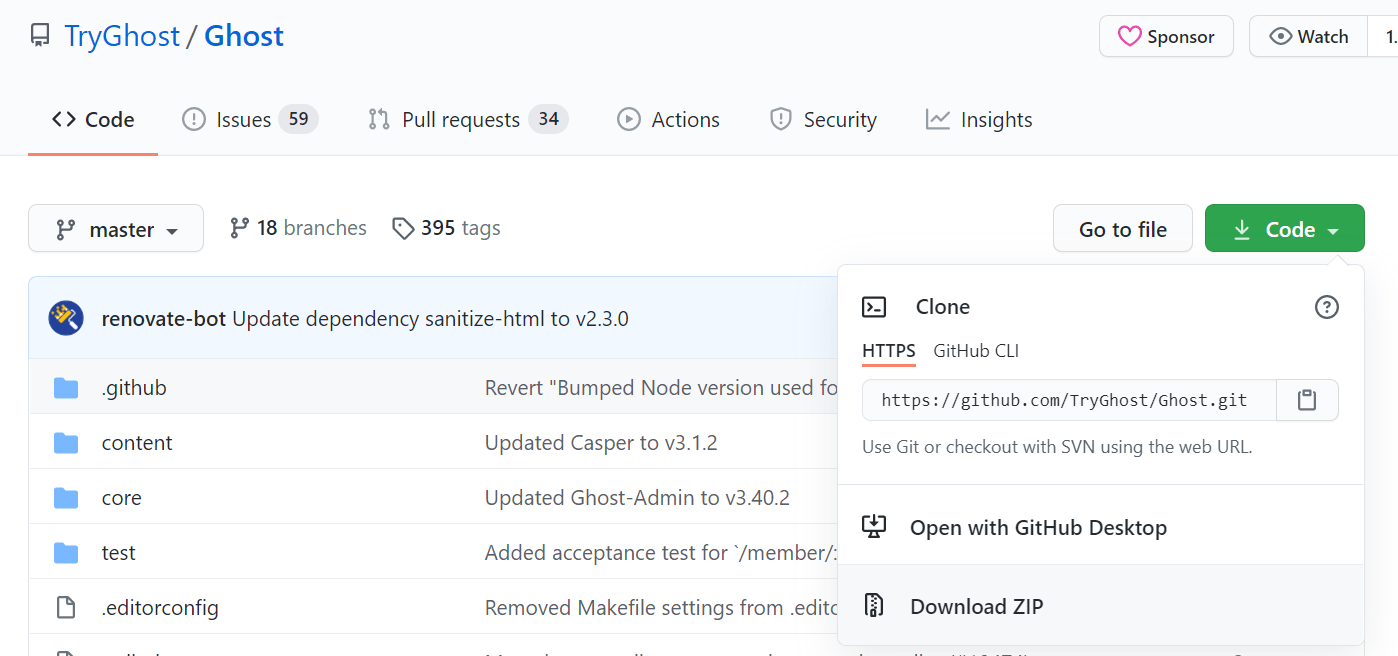
Once NodeJS is installed, you can either download the official Ghost source code from GitHub or use node package manager (npm) to install Ghost CMS. I prefer using npm since it is way faster and easier. So that is what I will show below.
Note: At the time of me writing article, Ghost 3.0 is the most up-to-date version of Ghost CMS. But the installation should be about the same with future versions.
Where to install Ghost CMS?
Honestly, chose any folder you would like. Since Ghost CMS runs on NodeJS, you are not required to use an particular directory to install Ghost to. Unlike other server software like Apache. But since I do loads of regular PHP development and have XAMPP installed on my Windows laptop, I am going to have my Ghost blog in my usual htdocs folder.
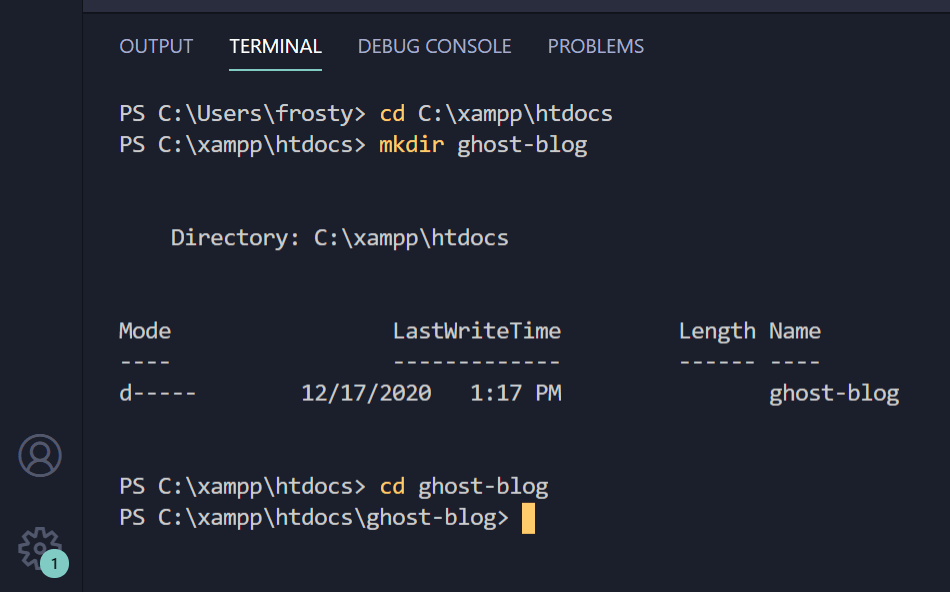
No matter where you want to install Ghost, use your terminal to navigate to that directory (using the cd command). Then create a new folder to actually install and be the home for your Ghost blog (e.g. "ghost-blog"). And finally navigate into that new folder ("cd ghost-blog").
cd C:\xampp\htdocs\
mkdir ghost-blog
cd ghost-blog
Install Ghost CMS in Windows with npm
Once inside of your newly created Ghost blog folder, you are ready to install Ghost CMS. It takes two steps.
- Install the Ghost CLI (command line interface)
- Then actually installing the Ghost blog website files
Possible error: "ghost.ps1 cannot be loaded because running scripts is disabled on this system."
If you are getting the "ghost.ps1 cannot be loaded because running scripts is disabled on this system" error message (or something similar), then you will need to run the two installation commands with the runas command prefix. This will force PowerShell to run the command as the administrator account you specify. Just include and update the command below to run each as an administrator. Like this:
runas "/user:<username>" "<your_command_here>"Or you can run VS Code/terminal as an administrator, then give VS Code permission to run commands in terminal as an Admin with the following command:
Set-ExecutionPolicy UnrestrictedInstall Ghost CLI in Windows
npm install -g ghost-cli@latestWith that single command, your Ghost CLI installation will begin downloading and installing, automatically. With the latest version of course. My install took about 23 seconds. So not to bad.
Actually Install Ghost CMS in Windows
ghost install localWhile installing Ghost CMS, you may get a Windows firewall prompt to allow NodeJS to access the internet (or be accessed by other devices on your local network. You will need to allow at least the "private networks" option to be able to actually view your Ghost blog.
Once the installation is complete, it will automatically start the Ghost server for you.
How nice of them :)
Enjoy your new Ghost blog on windows!
That's it. You are done installing Ghost CMS on Windows. Super easy right? Right! You can browser over to your Ghost blog by navigating to the localhost url that is given in your terminal window. Likely something like http://localhost:2368/ghost/.
From this url, you will be able to complete the Ghost CMS setup and customize your Ghost blog. Enjoy all the greatness and speed of Ghost CMS!
Finish the Ghost blog setup wizard
With your new Ghost blog created, you can work your way though the quick setup wizard. The quick steps will let you create your first account and even invite other users to be Ghost CMS managers of your new Ghost blog.